Wednesday, August 21, 2013

Kitchen Remodel....the outcome!

Happy Hump Day

I write this post with a gigantic smile on my face.  The kids and I went to Balboa Island for a week long vacation.  My landlords chose to use the time we were away to renovate the kitchen for me.  I have never lived through a real remodel but I know enough to realize that I am very fortunate to leave for ten days and return to a new kitchen!  


Here it is.  I could be no happier!!  They did a fantastic job.  When we sat down to discuss it I said that I wanted a particular sink.  Unfortunately, due to the way the kitchen was configured, sink on the corner of the counter, they said that an apron sink would not work.  


They then came back to me saying that they were willing to reconfigure the layout of the entire kitchen in order to accommodate my sink.  They moved the stove as well as the sink and wrapped the countertop all the way around the room.  Here is a quick look at the old configuration.  


And, now.  It feels like a completely different room.  


I had my heart set on a few things.  Both came from Ikea, the sink, called the domsjo, and butcher block countertops, called numerar.  I preferred the oak.  It has been discontinued though so I chose the beech.  I want a slightly deeper shade so am considering staining them.  


I also knew that I wanted subway tiles.  These are daltile in the standard 3" x 6" size.  I originally thought that I wanted white grout.  But after doing a little research I learned that many people who thought similarly ended up regretting not using grey grout.  I wanted the tile to stand out as subway tile and I felt, after spending hours and hours on Pinterest and Houzz, that the white grout just did not accomplish that.  I am thrilled with my decision.  


The cabinets are the only element I did not have a say in.  And they choose ones exactly like I would have.  My favorite part is that they are the kind that close on their own....and silently.  Ok..... maybe my other favorite part are the lazy susans.  Such a great use of space!


The other element that was updated was the hood.  My intention, in order to finish this room, is to put in a stainless steel range.  So, they put a hood in that will match it.  


I will also have to add the hardware, pulls and knobs, to the cabinets.  


 Now comes the time to consider how to treat the countertops.  I have done some research on this topic as well ;)  There are many options and exponentially more opinions out there.  I want to protect them but also want to be careful about the chemicals I use to do so.  A woman named Vanessa talks about installing the same countertops I have in her blog this and that.  It is a great and very detailed post.   I love the way she stained hers.  They turned out beautifully.  I am considering using the same stain.  She sealed them with a product called Waterlox.  And though I love the look and am sure that it protects her countertops very well, I am a bit concerned about something which requires me to wear a respirator fitted with an organic cartridge to apply it.  I guarantee that most people would say that I am being overly cautious.....and I likely am. :)  If anyone has input on this subject, I would greatly welcome it.  


  One last thing that I did was to add stick on led lights underneath the cabinets. 


Thanks for bearing with me through this long post.  I am very excited though, to share it with you!  And super grateful to my kind landlords, Lily and Ben.


Have a good one!

Michele

Tuesday, August 6, 2013

Kitchen remodel

Good morning  

This is a post I have been waiting to write for a long time.  As you may know I live in a rental unit in San Francisco.  It is a lovely old building.  And I have been making small, slow improvements since I moved in.  Not huge renovations....just lighting, painting, panelling.  These things make a big difference, as you will see below. 

 What I am currently focused on is the kitchen.  After a small facelift I still am bothered by the countertops.  I understand that these were quite popular back in the 70's :) I decided to speak with my landlord to see if I could replace them.  I found beautiful oak butcher block at Ikea. (These have since been discontinued.....such a disappointment)  They said that they would have to think about it.  

Here is what I started with and the improvements I have made thus far.  (sorry for the poor quality of the below photo.  It was the only one I could find).


The cabinets and underneath the countertops were another thing that drove me nuts.  I realized that painting wood like this was not going to yield a kitchen worthy of Country Living.  But anything, I figured, was better than this.  

I also played around with color on the walls.    


For the purposes of this post I will show you the before, and the in progress photos.  


I wish I had a pic of the old lighting.  

Below is what it looks like today.  I added mercury pendants and baskets above the cabinets for storage.  I painted the cabinets, walls, and changed the hinges.  


The addition of the wainscoting, in my opinion, made a huge difference.  


Now back to the countertops.  A few months ago I went on a short business trip.  I returned to an apt resembling a hot sauna.  The tap, faucet, (not sure what the correct name is) which brings the hot water into the washing machine had broken.  I drove up to find all of the windows steamed up.  As I entered I heard the distinct hissing sound of spewing water.  It was so hot that I could barely touch it as I tried to turn it off. I don't know how long this had been going on.  Somehow, though, the water stayed in the kitchen and drained to the garage below me.  I am grateful every day that it did not ruin the hardwood floors, and everything in the apt.  


I call these photos the in process ones because there is a favorable outcome.  It turns out that the water created mold at the base of the cabinets.  Therefore the insurance company will pay to have new ones installed.  And fortunately for me, that means new countertops as well!!!  

I am grateful to have such considerate landlords.  Though I obviously need to stay within the budget, they have consulted me on what I want, and are making genuine efforts to create a kitchen that I will be happy with.  

The remodel begins on Friday.  I will update you as soon as it is complete. 

Thanks for visiting

Michele 

Thursday, August 1, 2013

You know you live in an old building when........

Happy Thursday.  

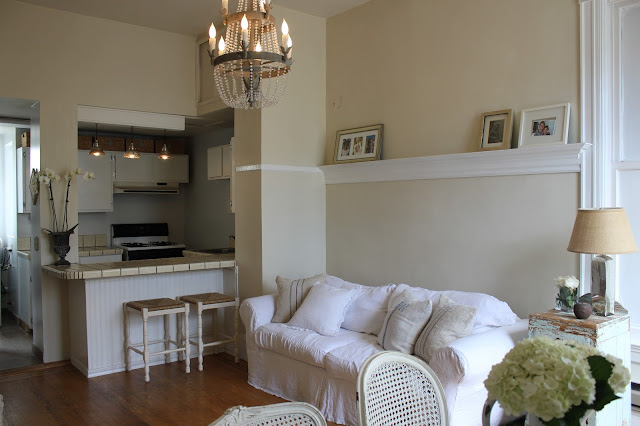
I have wanted to replace the lighting in our living room for years now.  I found the chandelier a long time ago.  But just recently I purchased it and had it installed.  Well....partially installed.  Here are a few before pics.  


Can you imagine why I wanted to replace this?


Here are the "in the process pics".


I understand that this building is old enough that the lighting used to be provided by gas lamps.

Here is the problem.  As you can see below, it could not be put in flush with the ceiling because there is a 4 inch gas pipe which extends down from it.  Due to the weight of the chandy, there is also a 4 inch long mounting plate.  This prohibits the use of a canopy to cover the space and wires because they are tapered and not that wide. I may be able to go to a vintage lighting store and find a pretty simple fix.  


I was given the option of cutting the pipe.  I chose not to do that. :) I will either have a custom medallion made which will have some depth to it.  Or, a friend suggested recently that I have a circular molding made to match what already adorns the room.  


I will update you when I have remedied the problem.  

Thanks for visiting

Michele